Wednesday, December 6, 2017

Cranberry Chicken Quinoa + Green Beans

My mother in law made a version of this over the summer, and I've been meaning to try and recreate it ever since. I finally got around to buying cranberries and decided to give it a whirl. While it isn't complicated, it is the first time I've made something entirely without a Pinterest recipe as a basis or without falling back on a meal my mother taught me how to make. As a result, it is fairly simple, but still delicious.

I have a feeling I will be tweaking this one over time, adding in spices as they suit me and whatnot. For now, I like it as it is. It only takes about half an hour (provided that your chicken breasts are already thawed) so it is great for nights you are strapped for time.

My toddler has become suspicious of all new foods, but I got her to at least try the cranberries. She calls them her "new berries."

Ingredients 

  • 2 thin sliced chicken breasts
  • 1 bag of cranberries (3.5 cups)
  • 1.5 C water
  • 3/4 C dried quinoa
  • 1/4-1/3 C sugar
  • 1 TBSP extra virgin olive oil
  • 1 bouillon cube
Optional:
  • 1 can of green beans
  • 1 bouillon cube

Directions

  1. Preheat your oven to 400 degrees. Line a baking tray with tin foil and arrange your cranberries on top in a single layer. Bake for 15-20 minutes. 
  2. While the cranberries are baking, pour the olive oil into a large pan and heat on medium-high. Cook your chicken breasts for 2 minutes on each side. 
  3. Pour in your water and quinoa around the chicken breasts and add a bouillon cube. Bring to a boil then reduce to a simmer and cover. Simmer for 15 minutes or until the quinoa absorbs all the liquid. 
  4. When the cranberries are done, pull them out and transfer them to a saucepan. Add your sugar and stir to coat. When there is about one minute left for the quinoa, add in your cranberries and recover. 
Optional:

I chose to serve this with green beans, but it would go well with several other vegetables (e.g. squash, sweet potatoes, asparagus, etc.). If you decide to go with green beans, heat them in a small saucepan over medium heat along with a bouillon cube for 5-10 minutes. If you are using fresh green beans, add water to simmer with the bouillon cube or use chicken stock. 

Nutrition Information

The nutrition information below is for 1/3 of the quinoa, green beans, and cranberries (using 1/4 C sugar) as well as 2/3 of a chicken breast. 

Calories
Fat
Carbs
Protein
Sodium
Sugar
Fiber
403
8
61
20
203
22
6

Wednesday, August 2, 2017

Crockpot Hawaiian Chicken

I am a big fan of crockpot meals. Now that I have two kiddos, I have less time to make dinner every day. I keep a few crockpot freezer meals on hand for days that I know I will be short on time. I pull them out 24 hours ahead of time, then toss them in the crockpot the next day. Of all the meals I've tried, the Hawaiian chicken was a family favorite.

Ingredients

To make enough for two adults and a toddler (plus left overs for my husband's lunch the next day), I use the following:
  • Two defrosted chicken breasts
  • Half a bottle of Hawaiian BBQ sauce (I use Lawry's)
  • An 8oz can of crushed pineapple
A friend suggested adding red pepper chili flakes to give it some kick.

Directions

I put the ingredients in that order into the crockpot and cook on low for 3.5-4 hours.

As sides, I prepare basmati rice and green beans. I make the rice according to the package. The green beans I put on the stove and add a bouillon cube to the water for flavor. I cook them on medium for 10 minutes or so.

Nutrition

The nutrition information below includes 3 oz of chicken, one serving of basmati rice, 4 tbsp of the marinade sauce drizzled over the rice, 1/4 cup of crushed pineapple, and one serving of green beans with bouillon.

Cals Fat Carbs Protein
382 2 69 20

Easy Chicken Fried Rice

This was yet another Pinterest find. Many Pinterest recipes like to boast that they are easy to get people to click through to their site, but this was actually very simple. My husband and toddler demolished this meal so I would say it was a success.

Ingredients

  • Two chicken breasts
  • 4 cups cooked brown rice
  • 1.5 cups mixed frozen veggies (I used a blend of carrots, peas, and corn)
  • 1 teaspoon minced garlic
  • 3 green onions, thinly sliced
  • 3 eggs
  • 2 tbsp sesame seed oil
  • 2 tbsp coconut oil
  • 3 tbsp low sodium soy sauce

Directions

Prepare the rice according to the package and set aside. 

Cut your chicken into one-inch cubes, Add the oils and chicken to a large non-stick skillet and cook over medium-high heat. When cooked through, remove the chicken, but leave the oil in the pan. Add in the mixed veggies and green onions. Cook for a couple of minutes until the veggies soften. Stir in the garlic and cook an additional minute. 

Beat your eggs in a bowl or cup. Move the veggies over to one-half of the pan and pour your eggs onto the other half. Scramble the eggs until done. Add the chicken back in as well as the rice. Mix thoroughly. Add the soy sauce and stir until well mixed. 

Nutrition 

Cals Fat Carbs Protein Sodium Fiber Sugar
Per 1.5 cup 434 17.9 45.2 25.6 479.1 3.3 2.4

The next time I make this, I think I'm going to reduce the coconut oil by half. This will reduce the fat by 3g and calories by 25.

Lighter Creamy Chicken Stuffed Shells

My mom found this recipe on Pinterest, and it was an immediate hit. However, it has mayonnaise. Mayo and I do not have a good relationship. It kills my stomach and carries a significant caloric punch as well. I decided to lighten this up by using Greek yogurt instead. It still tastes amazing, but the Greek yogurt reduces calories and fat while increasing protein. I also use almond milk instead of regular milk because I can't tolerate it.

Ingredients

To make these stuffed shells you will need the following:
  • 12 jumbo shells
  • Betty Crocker chicken flavored homestyle stuffing
  • 12 oz of chicken (~two breasts)
  • 1 single 5.3oz container of plain Greek yogurt (I used Chobani)
  • 1 can cream of chicken soup
  • 2  cups almond milk

Directions

Preheat oven to 350 degrees.

Boil your noodles, cook and dice up your chicken into tiny pieces, and prepare the stuffing according to the package. Mix the chicken, stuffing, and Greek yogurt in a bowl. Once mixed, stuff your shells and place them in a 13x9 baking dish. 

In a separate bowl, mix together the cream of chicken soup with the milk. For a thicker sauce, use one cup instead of two. Pour over the shells, then place in the oven and bake for 30 minutes.

Short on time? Increase the oven temp to 375 and bake for 20 minutes. 

Nutrition Information

Cals Fat Carbs Protein Sodium Fiber Sugar
Per 2 shells 334 4.5 39.8 23.5 664.7 3.1 4.5

Wednesday, June 28, 2017

Comparing Baby Carriers: Ergo, Moby, and Nesting Days

With my first baby, I only wanted one carrier. I had done my research and I knew I wanted an Ergo. It served us well and I continue to use it with my now two-year-old to this day. However, having a preemie changed the game. The Ergo was great for my normal sized tot, but my undersized preemie could not go in the Ergo until she gained quite a few more pounds.

I was also curious as to what other wraps were available. I knew my second would be born premature (thanks, Cholestasis), so I bought a used Moby and practiced wrapping it in the last few weeks of my pregnancy. My mother in law also bought me a Nesting Days carrier. I had never heard of this brand before, but a friend of hers recommended it. She's had quite a few children, so I figured she must know what she's talking about. Here are my reviews of each carrier including pros and cons.

Ergobaby Original Carrier

I own the original Ergo, not the 360. Babies have to weigh at least 7 pounds to go in the infant insert. They must weigh at least 12 pounds to go in the Ergo without the insert. Ergo also recommends that baby is at least 4 months old before putting them in the carrier without the insert. The Ergo Original supports up to 45 pounds.

Pros

  • The Ergo is not a wrap, so it does not encase the entire upper body. It breathes much better and is not nearly as sweat inducing. This is my carrier of choice for extended outdoor time or physical activity, such as walking or hiking. 
  • Baby can be worn on the front or the back (once baby reaches weight/age requirements).
  • The Ergo is adjustable so several individuals can wear the Ergo. I could wear my toddler comfortably at 30 weeks pregnant because of the ability to adjust the fit. 
  • The Ergo has a hood feature that allows you to create a canopy over the baby. I used this on hot/sunny days and while the baby was asleep. It provides head support for babies who like to throw their head back while sleeping. It can provide privacy for nursing as well. It has snaps that allow you to secure it. 
  • This carrier allows for discreet nursing. It took a couple of tries until I got the hang of it. I had to adjust the straps to lower my baby so she could nurse comfortably. 

Cons

  • The Ergo does not strap across the baby's back like many wraps do. It has one panel holding the baby in. This is not an issue until the baby gets over a certain height. Then the Ergo only supports them part way up their back. This did not happen for my toddler until she was almost a year old, and she is super tall. 
  • The infant insert is difficult to use. The carrier comes with visual instructions on how to use it, but it never got easier for me. I didn't start to use this carrier often until my baby could sit in it without the insert. 

Cost

  • $90-$120 depending on print
  • $135 when purchasing with insert. One color is available for $90 with the insert. 
Me wearing E while 30 weeks pregnant. I have the hood up over her as she was napping.
She has her head turned to the other side and I have it loose so there is a gap for air flow.
Husband wearing E on his back

Moby Wrap

I bought my Moby wrap used because I had a feeling I would not like it. Or, rather, that it would be more difficult to use. I didn't want to spend a lot of money on something that did not work out. Babies must weigh 8 pounds before placing them in a Moby wrap. The Moby wrap supports up to 35 pounds.

Pros

  • There are several ways to carry a baby in the Moby. I used the newborn hold most often. 
  • The Moby crosses over the baby's back and shoulders and has an additional support panel. Baby feels very secure.
  • It is easy for baby to nurse in the Moby.
  • Anyone can wear the same Moby since it is one continuous piece of fabric. 

Cons

  • The Moby is several yards of fabric and can be difficult to wrap right on the first try. 
  • The wrap fits differently every time since it is one piece of fabric rather than a structured carrier. Sometimes I would have a great fit and other times I would have to re-wrap it. Structured carriers fit the same every time (providing nop one else wore them/adjusted them).
  • The fit becomes loose over time as the fabric stretches while wearing a baby. 
  • While it is easy to nurse the baby in a Moby, it is less discreet (at least in my experience).
  • The Moby gets hot quickly. This is a plus during the winter, but cumbersome during warmer weather. 

Cost

  • $45

Nesting Days Carrier

I had never heard of the Nesting Days carrier and it seems many others have not either. My mother in law bought it for me, and it has served me well. The carrier is meant to act as a second womb. The company encourages wearing baby skin to skin. The company recommends asking a doctor about using their carrier for babies under 8 pounds. It supports up to 18 pounds. This is technically a sling as babies can recline in it, but the company recommends keeping newborns in an upright position. 

Pros

  • This is by far the easiest carrier I have every used. There are no buckles, inserts, or complicated wrapping techniques involved. I step into it, pull it up around my torso, slip one arm in, slide my baby into the panel, slip in my other arm, tie the two loose pieces together, then pull up the bottom panel for support. It's similar to putting on overalls except the two arms pieces cross over each other to provide more support for the baby. I included visual instructions below. 
  • It is much lighter weight than the Moby wrap. 
  • It allows for discreet nursing.
  • The fabric is similar to active wear. It has some give without stretching out, much like yoga pants. 

Cons

  • It is not one size fits all. They come in small, medium, large, and extra large. 
  • It has less of a weight range than the other carriers so babies will outgrow it sooner. 

Cost

  • $89 for 4-6 weeks delivery
  • $99 for 1-3 days delivery
This is the Tea for Two color.
The bottom part around her hips can lift up to add support much like the Moby.

Final Assessment

My favorite option by far is the Nesting Days carrier, at least for the early months. It provides support like the Moby but is much easier to use. It is also much less suffocating due to being made of less fabric. Every time I wear my baby out in this carrier, someone stops me to ask me what it is and where they can get one. 

Once my baby outgrows the Nesting Days carrier, I will likely switch to the Ergo. I plan on keeping my Moby because it offers several ways to carry the baby that the Ergo does not. However, during the summer months, I will likely avoid the Moby because it is so much material and stuffy.

If cost is an issue, the Moby is half the price of the other carriers. While it requires more steps to put it on, it is a more wallet-friendly option. It provides more carrying holds/options than the other carriers as well. While I prefer the Nesting Days carrier for its ease of use, I can use the Moby for longer since it supports up to 35 pounds compared to Nesting Days' 18 pounds. .

Saturday, April 1, 2017

Welcome to the World Baby Girl

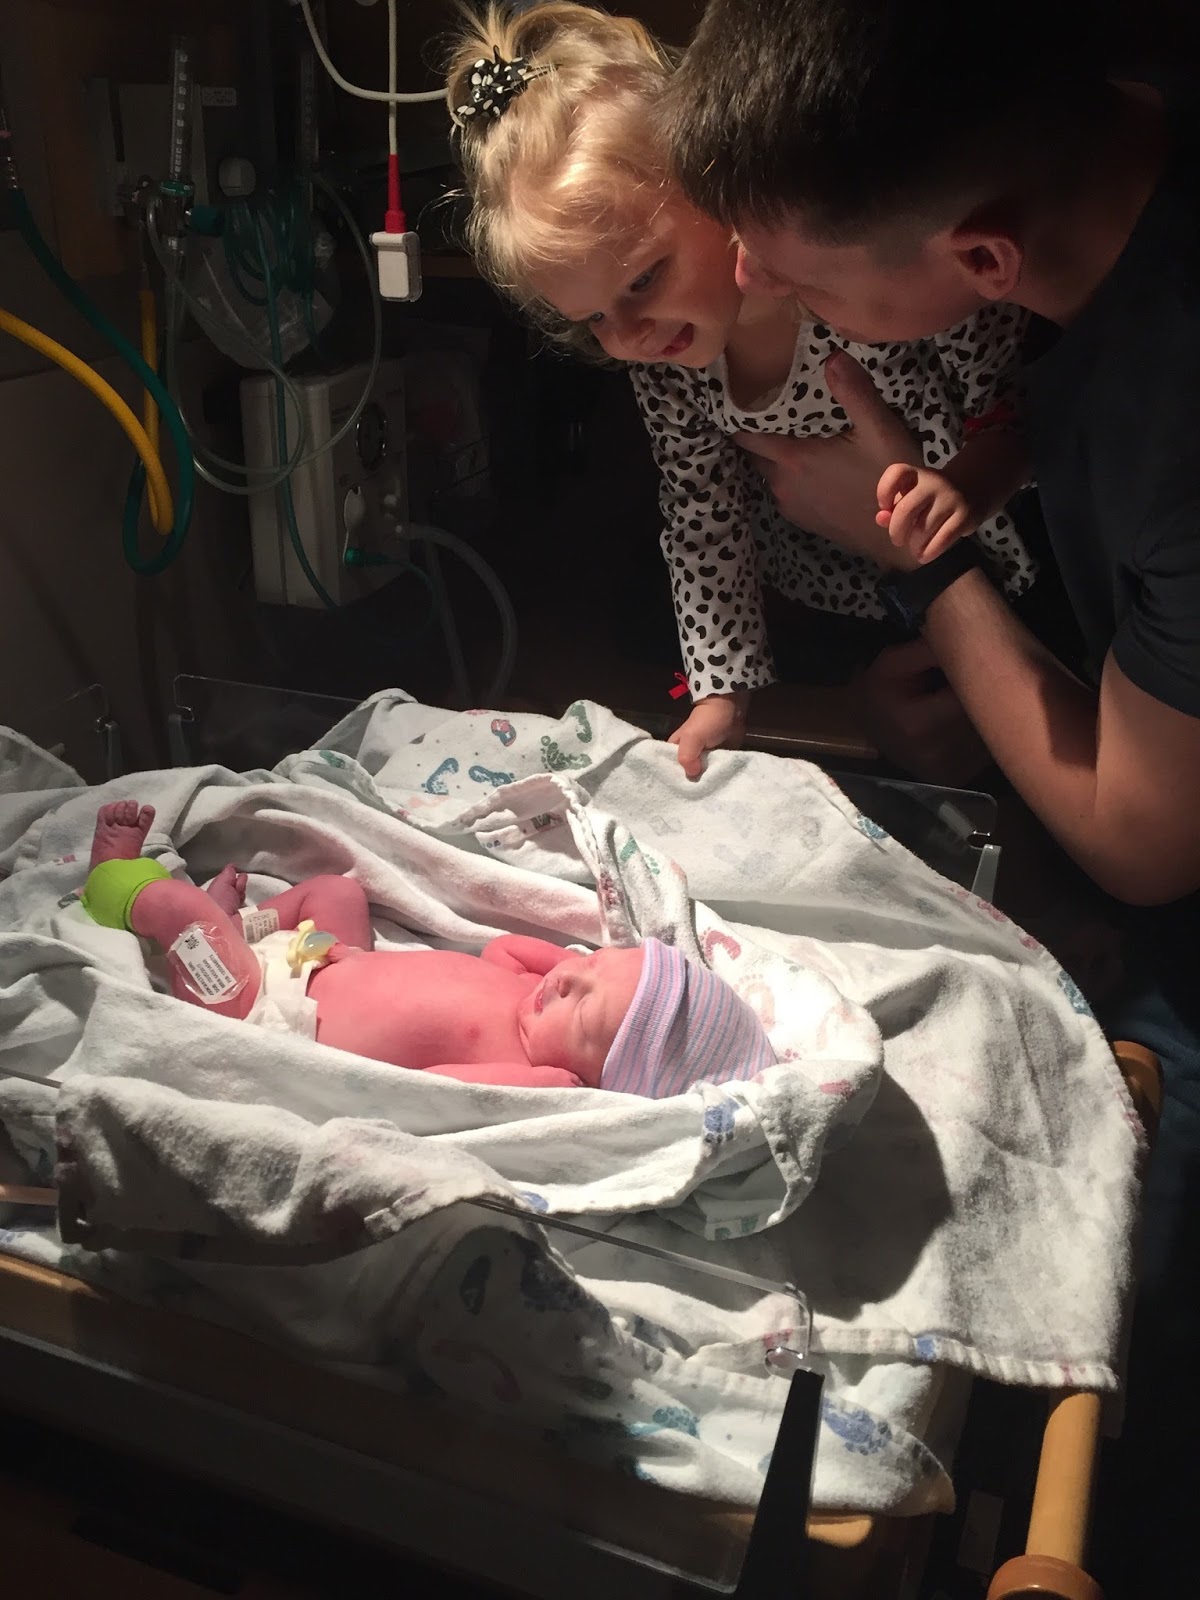
As of March 25, 2017, our family of three became a family of four. Baby girl (P) joined the outside world at 6:53 p.m. She weighed 6 pounds and measured 19 inches long. Her head was 32.5 cm, half a centimeter bigger than E's.

Birth Story

Despite having a scheduled induction for March 25, P was almost born on the 23rd. I am apparently incapable of having an uneventful OB appointment. My mom flew in on the 22nd, so she had E and hubs went with me to my NST appointment. Baby girl failed it spectacularly. Every time I contracted, her heart rate decelerated. My midwife said it was 50/50 whether I had a baby that day or not. 

I was a hot mess. This was my limit. We were scheduled to take family photos that very evening. I was so upset that we might not be able to take them. I'm not sure why this was the event that pushed me over the edge. I guess all of the issues coalesced and peaked at this moment. I was not ready to have the baby. I wasn't fully prepared for Saturday; I was not ready at all for Thursday. 

My midwife called my OB, and I was sent to L&D for more monitoring. P started to behave, and, after five hours of monitoring, L&D let me go home. As I mentioned in my last blog post, we did get our family photos done by Jackie Jane Studios. I absolutely love them. Here is my favorite:


The day before the induction, I called the charge nurse at the suggestion of my doula and OB. I asked about their wireless fetal monitor and if I could request it. I also asked that they charge it so it wouldn't run out of juice during labor. My OB told me to mention I wanted another unmedicated labor and to request a nurse who prefers that kind of labor. 

I set my alarm for 6:00 a.m. on the 25th and called the charge nurse to see when I should arrive for the induction. She told me to arrive between 7:30-8:00. I couldn't sleep anymore, so I got up to eat and get ready to go. At 7:00, the nurse called me back and told me they had a lot of people come in and they weren't sure if they would be staying or not. She told me to call back at 8:00, and hopefully they could get me in by 9:00. I was already anxious (knowing when you're going to have a baby is the weird), so this just added to my nervous energy. I ate some breakfast and called back at 8:00. They told me to come in at 9:00. 

I said goodbye to E and my mom. Hubs and I checked in, but that took a lot longer than I expected. My nurse checked me and said I was a solid 4 cm dilated, 70-80% effaced, and P was at -3/-2 station. I gave my nurse a goodie bag at this point with a thank you note. I filled the bag with candy, cookies, and crackers with various filling (cheese, peanut butter, etc.). The thank you note thanked my nurse and OB for the care they were about to provide. I also apologized for any mean things I may say during labor, haha. This is an obvious bribe, but it works really well. The nurses don't get normal lunch breaks, so easy to grab snacks are always popular.

The nurse hooked me up to a wireless monitor (this is money, every pregnant woman should investigate if her hospital has a wireless monitor) and set my heplock. My OB stripped my membranes at 11:30 a.m. I got a breast pump at noon and used it for five minutes on, five minutes off until 1:15 p.m. That got rid of my irritability contractions and started up some stronger contractions. However, it was not causing regular contractions. The nurse checked me again and I dilated to 5cm and baby girl dropped to -2/-1 station. Progress, but I was not in active labor yet. 


At 1:30 p.m., my nurse hooked up my IV and started Pitocin at a 1. She put it on the slowest drip possible because I was concerned about the constant IV drip. My concern was if I had multiple bags of saline pumped into me, it would artificially bloat baby P. When she dropped the water weight, it would seem as if she was losing absurd amounts of weight. My nurse was phenomenal and worked with my requests. We quickly bumped the Pitocin up to a 2 then a 3. The 3 established active labor. By 3:00p.m. I was contracting every 2-3 minutes and they were noticeably different in character. Before, the contractions just felt like tightening. With Pitocin at a 3, they felt a little bit crampy like right before starting a period. This was the point where my nurse said we had labor started now. 


We called my doula and let her know now would be a good time to arrive. She arrived around 3:45. I could still talk through contractions with no issue, but they were uncomfortable. We turned the Pitocin up to a 4 because I was still sitting at 5cmdilated. By 4:30, I no longer talked during contractions. I could if I had to respond to a question, but I preferred not to. I was also no longer sitting on my birthing ball, I wanted to stand. My doula suggested I get on hands and knees. We lowered the bed and put my birthing ball in the bed. I draped over and rocked slightly back and forth. Hubs did hip squeezes and counter pressure on my lower back while my doula rubbed a pressure point in the center of my feet with an oil. I also had a citrus-scented essential oil on a hand towel near my face. 

At 5:30, my OB came back to the hospital (she was on call). The nurse was about to call her in because she felt things were picking up when my OB walked into the room. Apparently, the OBs can see the fetal monitor strip from their home computers. Pretty neat. She checked me, and I was 7cm dilated and baby girl was at +1 station. She asked if I wanted her to break my water at this point, but I asked her to come back in a little bit to check again. I felt certain breaking my water would send my labor into hyperdrive and I didn't want to blast through the last 3cm. At this point, my hands started shaking. Endorphin release, huzzah! My nurse turned the Pitocin down to a 2 because my contractions were coming in on top of each other. 


I could tell transition was just getting started. I could no longer be hands and knees. I stood at the foot of the bed and leaned over the ball while swaying. Hubs and my doula alternated applying counter pressure. I started making my goat noises (labor is beautiful, right?), which indicate transition is in full swing for me. I warned my doula ahead of time that my sarcasm gets intense when I'm in pain. I did not, however, think to forewarn the OB.

My OB came back at 6:15 p.m. to check me. I was in the middle of a contraction and not up to talking. When it ended someone commented to the OB that the contraction was over to which I responded, "adios, butthole." My OB lost it and was cracking up, "What did she just say?" and the nurse (or maybe my doula? I forget, I was in a lot of pain) responded, "I think she just called the contraction a butthole."

I was 8.5cm dilated at this point, so we decided to break my water. My OB got everything ready and broke my water at 6:48 p.m. I felt a tiny trickle of water (low fluid levels, boo) and I could also feel a contraction gearing up. I cannot labor on my back. I don't know of many women who want to labor unmedicated while flat on their back. This was the only contraction that got away from me. This may not be the case for all women, but, for me, if a contraction gets going and I'm not mentally prepared, I cannot catch up to it. It's something that is happening to me rather than me working through it. I felt frantic and told hubs to get me out of the bed. He lifted me up, but my legs couldn't support me anymore. Hubs basically held me up through that contractions and then my doula suggested I get into bed to prepare for pushing. 

I climbed into the bed and draped my arms over the head of the bed like I did with E. This would allow me to rest between pushes. That was my thought process anyway. I announced to the room at large that I felt pushy and I felt a burning sensation. I realize now this is the "ring of fire" part of labor. Hubs told me after the fact that he could see the baby's hair, so she was crowning. The OBand nurses were clearing away the pads and towels from breaking my water when another contraction hit, I felt an overwhelming urge to push. I couldn't verbalize this, so I opted to shout "Pushy, pushy, pushy!" instead.

Hubs told me to push if I needed to. I didn't think the OB was behind me, but I figured E took me 20 minutes of pushing to birth. Surely, one push wouldn't be an issue. 

Wrong. One push and her head was out. Hubs announced, "Um...there's a head." My OB came rushing over and told me not to push. She checked to see if there was a cord around P's neck. There wasn't, so she told me to push when I felt ready. The next contraction rolled in, and, with another push, she was born at 6:53 p.m. True labor lasted about four hours (my labor with E was 9 hours). Only five minutes passed from breaking my water to holding our sweet baby. She started crying immediately. This was music to my ears. We were worried about her lungs, but she put those fears to rest immediately. 


I had no tearing, which is great. I had a "skid mark" as my OB called it. I had the same thing with E (in the same place, no less). I didn't require stitches either time, which makes me one happy momma. 

I got to do skin to skin and delayed cord clamping. We weren't sure this would be possible with P being premature. I didn't get to do the first check with her on me, though. They started getting worried because, even though she was crying, she was still purple. At some point, a whole slew of people came into the room. In addition to my nurse and OB, there was a pediatric team and a NICU team. One of them tried to take P from me. I curled around her and told the person "She's still attached." Hubs got to cut the cord. The OB and nurse both proclaimed it was a "juicy" cord, haha. 


They took P and she got an 8 out of 10 for both her one minute and five minute APGAR scores. She just would not turn pink. Finally, at 7 minutes, her color started to change. Hubs was with her and the doctors and got to see her color change. One by one, the NICU and pediatric team doctors left. This was great news because it meant she did not need immediate NICU attention.

Despite needing to induce early, I managed to achieve most of the things I wanted for labor and delivery. The wireless monitor was amazing. Even though I had to have constant fetal monitoring, it wasn't irritating because there were no wires. I had another unmedicated birth and got to labor/push in whatever positions felt most comfortable to me.

My nurse was really sweet and impressed with my labor. I remember saying at one point, "We should film this and show it to high schoolers to deter them from having babies." She laughed and said it would probably have the opposite effect and that I made labor look easy. My labor did go really well considering it was an induction. Inductions have a tendancy to be faster and way more painful than labor that starts on its own. My OB told me after watching my labor and delivery and seeing how well they went, she wants to try for an unmedicated birth with her next baby. 


Hubs called my mom and told her to bring E to meet her new little sister. E was initially interested but was quickly distracted by my lack of belly. She came over to prod at my stomach and ask, "Momma belly? Baby? Where'd it go?" She knew I was pregnant with a baby, but she did not understand the concept that the baby we were showing her was the same baby that had been in my belly.


We stayed the full 48 hours because P had to pass a lot of tests before they would let us go home. The first night she would not nurse. I could get her to latch, but she was so sleepy. I had some colostrum from pumping during labor and I pumped another 15 minutes that evening. I got 26ml in total, so they finger fed her 6ml at a time. She was riding the line for her blood sugar tests and ended up failing one of them by four points. They gave her some sugar gel and she started to wake up enough to nurse. Her scores improved dramatically, so they stopped pricking her before every nursing session. All that remained was the car seat test. She passed that with flying colors and we got to go home Monday around noon.


I wasn't sure how my body would respond after baby #2. I snapped back pretty fast with E, and I'm happy that the same is happening with P. Here is the belly four days postpartum.

Life adjusting to two littles has been a crazy ride so far. E is intensely jealous of P. She gives her kisses and loves on her, but then has epic tantrums over absolutely nothing. Her pediatrician told me it'll last for about two weeks. Then, it will be as if P has always been here.

P is doing great. She eats well and is gaining back some of the weight she lost. She dropped to 5lbs 8oz while in the hospital. She's up to 5lbs 10.5oz as of Friday. Her bilirubin levels are going down as well, so we don't have to go in every other day to get her foot pricked anymore. She's a tough little lady. 

Friday, March 24, 2017

Week 36: Final Projects + Getting Ready for Baby

It's so odd to think this is my last pregnant blog post. The next time I update, I will have a second child. Here are my comparison pictures. E on this left; this pregnancy on the right.


We managed to squeak in some family photos yesterday. I am so glad we got to capture our last days as a family of three. It almost didn't happen as baby girl failed her NST badly. I had an appointment at 0900 on Thursday for an NST and a biophysical profile. We ended up not leaving labor and delivery until 1515.

My OB and midwife are concerned that my placenta is crapping out on me. My amniotic fluid levels dropped a ton and baby girl's heart rate started decelerating with every contraction. I spent five hours on the fetal monitor. Once they repositioned me completely on my side, she started doing much better. They let me go home and we managed to get our family pictures taken. I am so grateful that Jackie Jane Studios was able to help us out last second. I reached out to one of my photographer friends from back home and she put us in touch, so thank you very much to Alex too!

DIY Home is Where the USMC Sends Us Plaque

One of my mom friends shared this idea on Facebook, so I had to take a crack at it. It's not done yet, but the hard parts are complete. I'm going to put a picture of each state we've been stationed in as well as interlocked rings for where we got married and little baby feet for the places I gave birth, I'm also going to include the dates we lived there. 


To make the EGA, I bought a stencil sheet and Exacto knife. I found a stencil online and traced it, then I cut it out. This gave me one giant red EGA. I wanted some definition for the ropes that wrap around the anchor. I also wanted to include North and South America. To do that, I took the piece I cut out initially for the main stencil then cut out holes for the parts that appear in white. I lined it up and laid it over the red once it was dry and filled it in.

To make the handwritten part, I bought some charcoal tracing paper and an ink pen. I found a font I liked online, adjusted it to the size I needed, and traced it onto regular paper. If my printer had ink, I would've just printed it. But alas, no ink, so I traced it. Then I laid the charcoal paper on the white board and put my traced letters on top of it. Then I traced over that once more to transfer it to the white board. After that, I filled in the tracing with a black paint pen.


Tuesday, March 21, 2017

DIY Hanging Mason Jars Instructions

I provided some details on how I made the hanging mason jar projects, but I've been asked for more details. The whole reason I made this particular project was because E grew and can reach into the junk drawers now. She kept coloring the tablecloth, walls, etc. I needed somewhere else for the pens and markers to go, but I didn't want them sitting out on my counters or put away in the closet/some other inconvenient location.

The other hanging mason jar crafts (here and here) were for decoration, so I coated the inside of those with paint. I opted not to do that for this project because I never know what color the walls will be in our next kitchen when we move and I didn't want the pens to scratch through the paint.

What You Will Need


  • A wood board (I got mine at Michaels, it came with a string for hanging it already attached)
  • Mason jars
  • Worm gear clamps/hose clamps
  • 1/2 inch tube straps
  • Wood screws (length will depend on the thickness of the wood board)
  • Screwdriver


I measured out how wide the board was and eyeballed where I wanted my mason jars to start and end. I also estimated how much mason jar I wanted to extend past the bottom of the board/how much of the pens/pencils I wanted to extend past the top. Then I measured out the area in between so they would be evenly spaced.

I screwed the top part of the tube straps down and slipped the worm gear clamps under the non-attached side. Then I screwed the bottom half of the tube straps into place.


I removed the center portion of the mason jar lids so the inside is easily accessible. Then I stood the board upright and slipped the worm gear clamps over the tops of the mason jars and tightened them into place. I made sure to turn the clamp fastener toward the back so they weren't so visible.


Then I put our copious amount of markers, sharpies, pens, and pencils into the jars.


Look how clean and organized my junk drawers are now!


Friday, March 17, 2017

Pregnancy Week 35: Cholestasis of Pregnancy

Here are my 35-week comparison pictures. The images with the white headband are with E's pregnancy. My brain is a little frazzled this week, so I swapped sides in each side-by-side on accident.


It would seem I need to keep my big mouth shut. Preterm labor reared its ugly head again. I felt off again over the weekend. On Monday, I started losing chunks of cervical mucus (most likely plug). Some of them had the slightest amount of blood. It was so minimal, I figured I would mention it at my OB appointment scheduled for the next morning.

I went in on Tuesday and my OB decided she would check me just to make sure nothing was going on. Before, I was 1.5-2cm dilated depending on who checked me. My OB felt I was 1.5cm. At this appointment, she noted I had dilated to 3cm. She decided to have me do a non-stress test (NST), and I failed it spectacularly. No sense in half-assing it, I guess.

Here is my print out. The top row is baby's heart rate. It should be in the blue. It obviously did not stay in the blue. The bottom row is my contractions. They were coming every 2-3 minutes, but they weren't particularly strong.


My OB sent me down to L&D for some monitoring. By the time I waddled on down there, I dilated to 4cm. Despite continuing contractions, my cervix held at 4cm for the remainder of my observation, so they let me go home. They noted I am 80% effaced and baby girl is still at -2 station.

Before going to L&D, my doctor had the nurses draw some blood. At my last visit, I complained of mild itching in seemingly random place: my feet, my wrists, and my jaw. The itching wasn't waking me up or excessive, so we decided to just keep an eye on it. A few days after that, the itching increased dramatically. I was drawing blood in my sleep, so I called again between my appointments to ask the nurse if this level of itching is normal. She gave me a few things I could try to relieve the itching, but nothing worked. I continued to complain about it at my Tuesday appointment, thus the blood test.

My OB called me on Wednesday with the test results. I have something called cholestasis of pregnancy. It's a condition where my liver stops processing bile acid. It happens in about 1 and 1000 pregnancies. The bile levels rise, causing the itching. However, it crosses the placenta and causes fetal distress. It also causes stillbirths.

I think my heart fell out of my chest when I got that call. Because of all the preterm labor issues I've been having, I received the steroid shots to rapidly develop baby girl's lungs at 30 weeks. I will receive another dose in the next week. I will be induced shortly after that. We are not sharing the induction date with the public at large. I have yet to wrap my brain around this.

Wednesday and Thursday I was in shock. Today, I am angry. I am angry that my labor experience will be nothing like I wanted. I am angry at my body for its incompetence when it comes to pregnancy. I am angry that I cannot do the one thing my body was most definitely designed to do. I cannot carry this child to term. I cannot protect her. My body is trying its level best to hurt her.

Today, I am allowing myself to be angry. If I don't, it will bottle up and explode and I do not have time for that.

Sunday, March 12, 2017

Pregnancy Week 34: DIY Reupholstered Glider + Mounted Painted Mason Jars + Washi Tape Phone Case Makeover

Everything has been fairly quiet in pregnancy land. I go in for another prenatal appointment on Tuesday so I may have some more updates then. For now, everything is going smoothly! At 34 weeks, most babies are 19-22 inches long and weigh around 4.9 pounds. They estimated baby girl to be 4.5 pounds at 32 weeks, so 4.9 seems about right. She is about the size of a pineapple, and boy howdy do I believe it. My right ribs feel like they're going to bust.

With E's pregnancy, I had my baby shower around this time. We played a game where everyone cut a piece of yarn that they guessed was how big around I was at my widest point. Whoever was the closest won. The winner was smack on with my belly. I found the string in an old purse during one of my many nesting/cleaning episodes. I am slightly smaller this time around. Here are the comparison pictures. E on the left; this pregnancy on the right. My belly was much rounder and cute looking with E.


DIY Projects

I have the craft bug. I have it bad. I finished reupholstering the glider this week. I found a used one I liked for $30. I liked the glider itself anyway; the fabric had to go and the cushions needed adjusting because the top sloped funny. I ended up buying $30 in new fabric to reupholster it. I got too much (surprise), but I would rather have too much than not enough. Plus, $60 for a glider is a heck of a deal since most of them cost more than twice that amount.

This glider was a little more complicated to reupholster than the one I did for E's room. This glider had a base cushion with multiple pieces of fabric rather than one solid piece. I am way too lazy for that nonsense. So I got my seam ripper and tore that fabric off completely. That left me with one piece of foam.

I took the seam ripper to the top piece as well because it had a thick cord all the way around that I did not like. I was going to undo the seams holding together the individual pieces on the top, but that turned out to be way more cumbersome than expected. So I left it intact and just made a slip cover for it instead. I removed the velcro pieces that attach the cushions to the back of the glider and sewed them onto my new fabric once I was done. Here is the before and after.

I also made some changes to the hanging painted mason jars. I decided I didn't like them hanging from the ceiling. I already have two mobiles (one over the crib and one over the changing table), so it felt like too much. The jars also wouldn't stay facing the direction I wanted, so I decided to mount them instead.

I got a piece of wood from Michaels for dirt cheap ($3.60 after using the 40% off coupon they always have on their website). I also got some tube straps, screws, and worm clamps from Lowes. That was about $5. I eyeballed where I wanted the jars to go, then measured it to make sure I spaced the jars evenly. I placed the worm clamp inside the tube straps and screwed them into place. Then I adjusted the worm clamps until they were tight around the mason jars. I hid the actual clamp part near the back since it's the prettiest looking.

The piece of wood came with twine attached to the back already, so it was easy to hang up on the wall. This is a pretty versatile project. Instead of flowers/decor, you can use it in the bathroom to hold makeup/supplies or in an office to hold pens, pencils, etc. It would also be cute for a craft room to hold paint brushes, knitting needles, and so on.


My last small craft was more for functionality than anything else. Hubs and I both got new phones recently. Our cases are identical and he kept accidentally taking my phone. I tried a few DIYs to distinguish the cases from one and other, but I never cared much for the outcome. Then I discovered washi tape. Or, more accurately, mylar tape. Washi tape with scuff and fade with time since the design is on the outside.

The mylar tape I have is metallic and the color portion is on the inside of the tape. Since I wrapped it all the way around the case to hide the edges behind the phone, it is easy to tell our cases apart from the back as well as the front. Here is the final result.


Monday, March 6, 2017

Pregnancy Weeks 32 + 33: So Much Nesting

My uterus has finally calmed down! My last OB appointment was uneventful and my cervix is holding steady. The baby was measuring really small, but I was pretty sure that was because she dropped lower. My OB ordered an ultrasound as a precaution. Baby girl is measuring spot on with my due date and her fluid levels look good. As expected, she's just really far down. The ultrasound tech wanted to grab a picture of her face for me, but baby girl was too low for her to be able to see her face. So now I am back to biweekly appointments instead of weekly. Hooray for normalcy! Here are my comparison pictures for 32 and 33 weeks.

32 weeks with E on the left; 32 weeks with this pregnancy on the right.


33 weeks with E on the left; 33 weeks with this pregnancy on the right.


Nesting

I have a crafting problem. I've made two mobiles, decorated a picture frame with gems, hung painted mason jars with flowers, and made another piece of wall art using mason jars for E's room. I also made block letters for the nursery, but I won't be sharing those until after I give birth.My crafts are spilling over into other parts of the house now (like E's room). I just want to organize, decorate, and clean everything.

Below is what I used to make the second mobile as well as a picture of the finished project (inspired yet again by my friend's mobile). I cut the flower bunches into individual stems so I could hang them with floral stem wires. I wrapped the uppermost part of the stems of the purple and white flowers and attached them on the inner most ring of the green wire. On the middle ring, I alternated between the smaller purple and white flowers. I also arranged them at varying heights. On the outermost ring, I attached the white flowers on ribbon.

I attached thin white ribbon to the center of each perpendicular bar to be able to hang the mobile. To hide the green and white wires, I wrapped the entire wire wreath with purple and white ribbon. I took care to not shift the stems so they stayed spaced how I wanted them. Then I used my glue gun to glue remanents of the small purple and white flowers to the top of the mobile.


Here is the first painted mason jar craft I did as well as the finished product.


I poured some paint into the jar and start spinning it to coat the inside. I added more paint as necessary. Then I placed them on some paper upside down to allow any excess paint to drain. I propped them up slightly to allow air in so they could dry overnight.

I took the top out of the mason jar and put the lid back on then I arranged the flowers how I wanted. I wrapped and tied the neck in twine, then hung them from the ceiling at varying heights.

Here is the second painted mason jar project.


I coated the inside of the jars in paint using the same method I described above. The wooden frame had hanging hardware so that it would hang like a portrait. I unscrewed it and reattached it so I could hang it like a landscape. Then I measured out where the center was above each empty square and put in a nail. Much like the first mason jar project, I arranged the flowers how I wanted them, wrapped and tied twine around the neck of the jar, and then hung them from the nails. I had to adjust this a few times to get them to hang how I wanted.

Michaels really needs to stop having sales and sending me coupons. I can't help myself.